Message Management |
|

Messages can be sent using the internal TRUX mail system or via standard Internet email. Messages can be sent to specified TRUX users or through pre-defined Message Groups. Messages can be modified and created as new through Message Management and will notify users of unread messages on the TRUX Homepage. Also see Related Topics.
Navigate To: System>Administration>Manage Message Groups
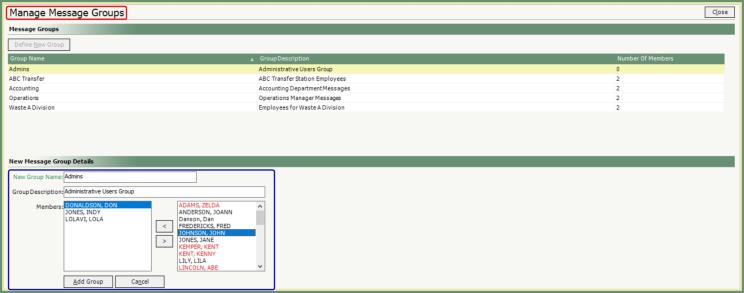
Define New Group
- Click Define New Group.
- Enter New Group Name.
- Enter Group Description.
- Highlight Members (Users) in the right column to be added to the Message Group.
- Inactive users are indicated in Red.
- Click the arrow pointing right to move the Members (Users) to the column on the left.
- Click Add Group when finished.
- New Group is added to the Message Groups grid.
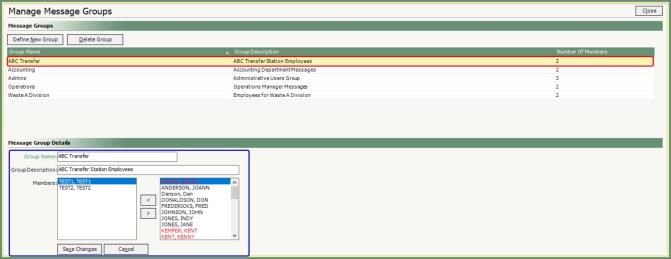
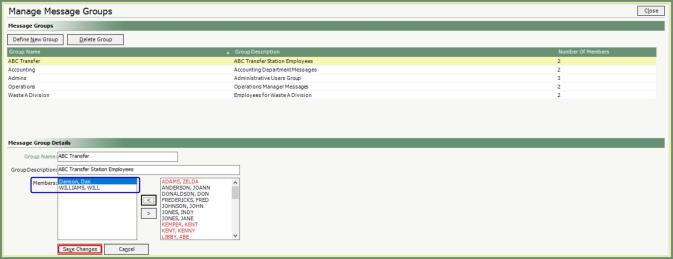
Modify Message Groups
- Existing Message Groups will populate the grid and indicate the number of members.
- Highlight an existing Message Group.
- Modify Group Name, Group Description and/or Members.
- Members can be removed by selecting the user on the left and clicking the arrow to the right.
- Add Members by selecting the user on the right and clicking the arrow to the left.
- Inactive users are indicated in Red.
- Save Changes.
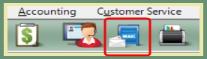
Navigate To: Customer Service>Message Management
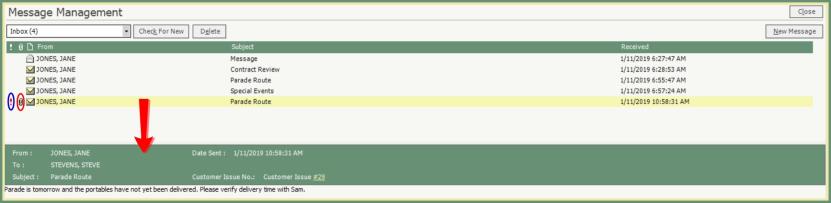
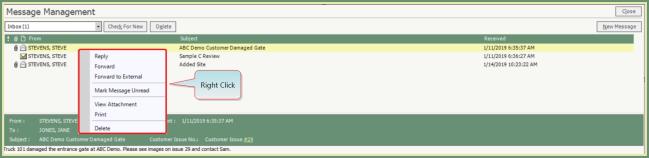
- Inbox will indicate the number of new messages in the inbox.
- Messages will populate in the grid.
- High Priority messages will be indicated with an exclamation point symbol in red.
- Attachments to the message will be indicated with a paperclip symbol.
- Envelope open or close will indicate if the message has been opened or not.
- Highlight a message in the grid and the details of the message will display in the green banner.
- Click Check For New to refresh the grid with messages received since the Message Management has been opened.
- Click Delete to remove an existing message.
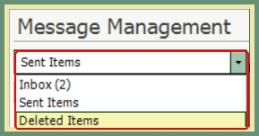
- Click the drop down to view Sent and Deleted messages

 .
. - Right click on a message to view reply options, mark as unread, print or delete and view attachments.
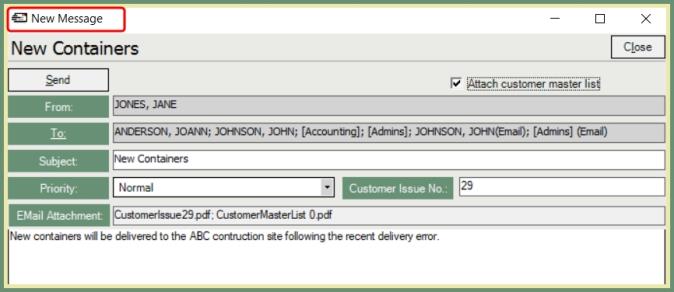
New Message
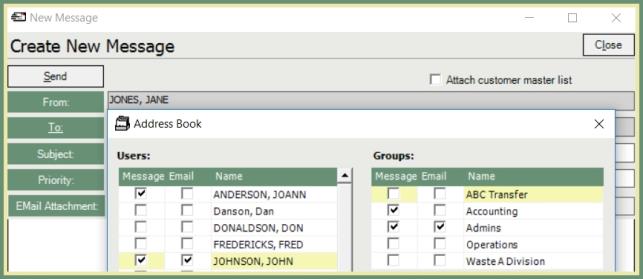
- Click New Message.
- Click To: and the Address Book will open.
- Select Users to Message and/or Email.
- Select Groups to Message and/or Email.
- Users will need to have the below settings enabled within Manage Users in order to send/receive Messages.
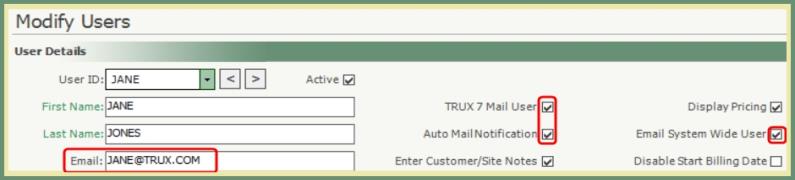
- TRUX 7 Mail User: The user can send/receive messages via Message Management.
- Auto Mail Notification: The user will see an envelope appear on the Message Management Icon
 when the user receives a message.
 - Email System Wide User: Indicates the user can send an email outside of your companies internal network.
- Click Ok. Send To field will populate with user and groups selected.
- Enter a Subject. The subject line will also appear in the message heading.
- Select Priority Level. High priorities will display with a (!) symbol in the message grid.
- Enter optional Customer Issue number to be attached to the message.
- Attach customer master list can be selected to include a PDF of the customer master information in the message.
- Enter message text.
- Click Send.

- Unread message count will display on the Homepage.
- Click the double down arrow to display the Mail Message List.
- Double click a message in the list to open.
- Click the messages link to go directly to Message Management.